

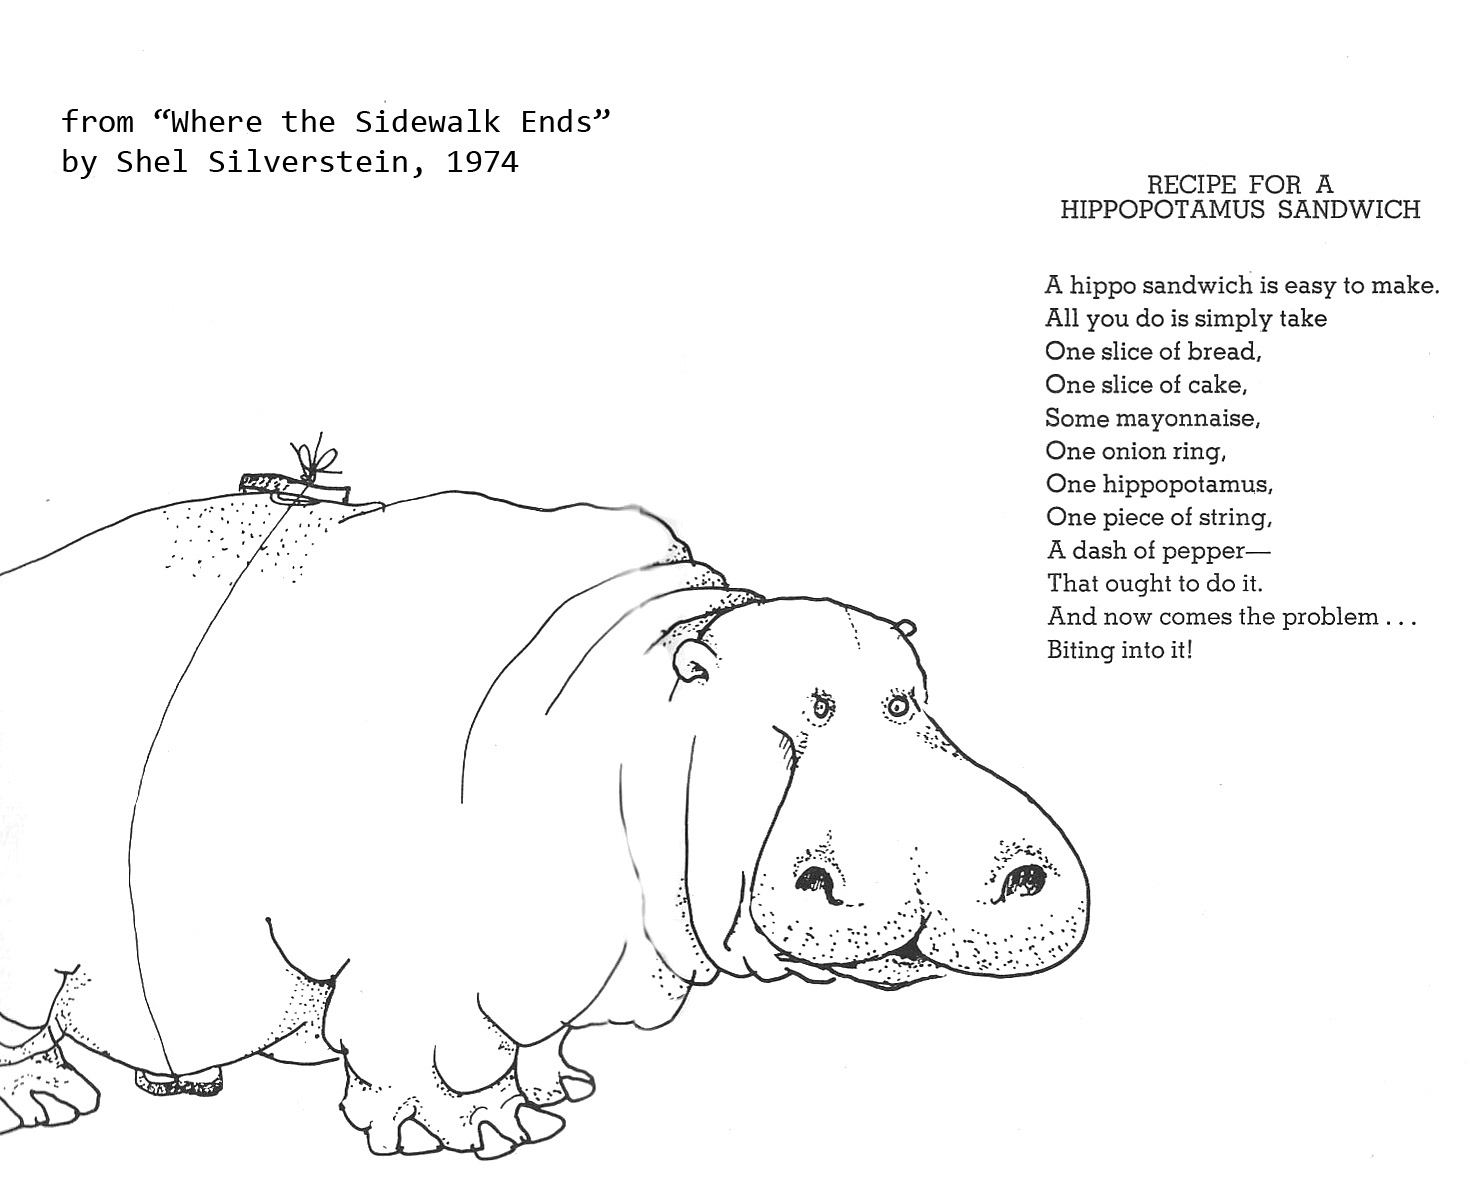
I used to teach an introductory 3d animation class at NYU/Tisch and after many years its structure evolved from unrelated class assignments to a semester long project. The students project was to animate one of Shel Silverstein's most visual poems, "Recipe for a Hippopotamus Sandwich."
To set a good example, I created my own version to give the students an idea of how the poem could be interpreted. The one constraint I gave myself was to not do anything that wasn't in the classes lesson plans.
So, as we say before eating, "Buon appetito!"
What's a "Water Horse Grinder"?
...and how and why I made it.
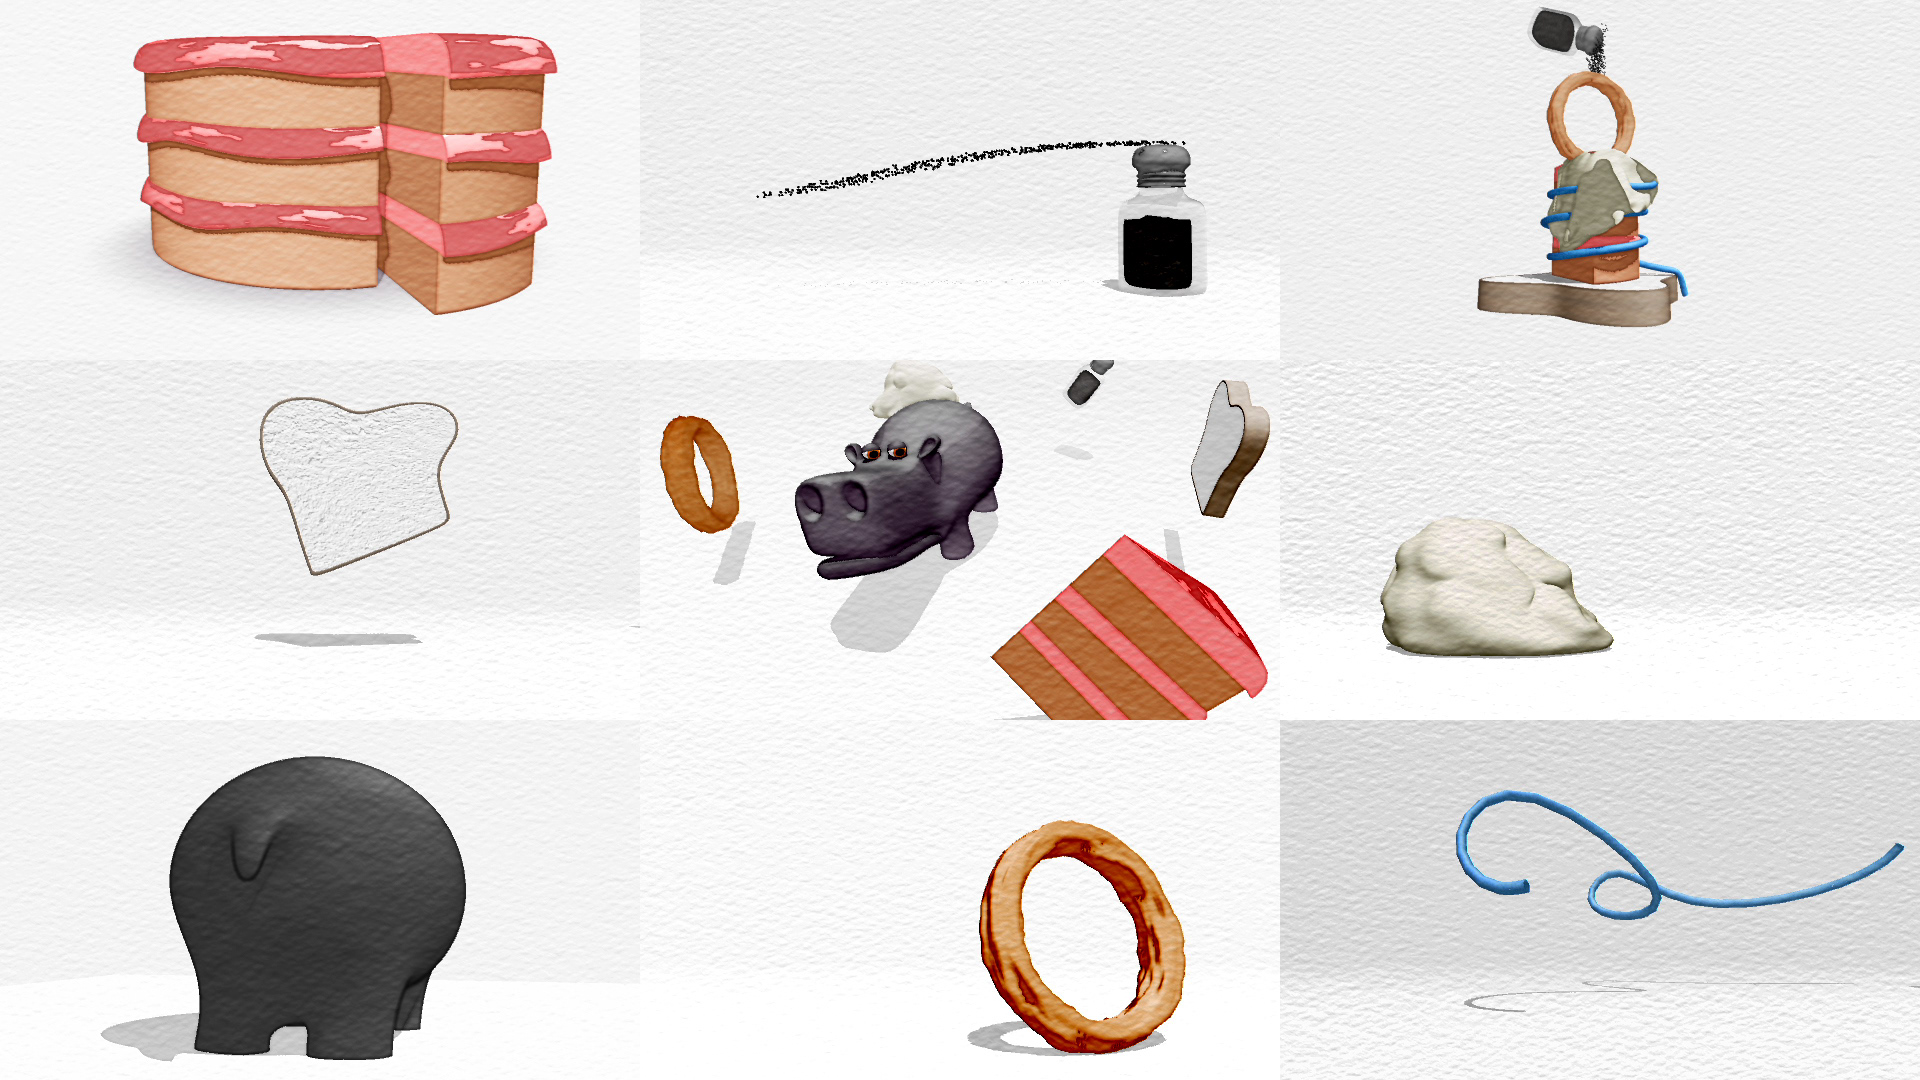
Stills from the finished animation.
When I first began teaching this class I had my students create some really cool short animations like rockets flying through through the solar system and jumping snowmen. But when edited together for the final project, it lacked personality. To change that I combined teaching the basics of Maya with a common theme that would lead to a coherent piece.

Searching for that theme, I went to my library. While my books failed me, my kids books did not.
Shel Silverstein, sitting there gathering dust, came to the rescue. Flipping through "Where the Sidewalk Ends" I read "Recipe for a Hippopotamus Sandwich" and lightning struck. It's one of his most object heavy poems and the visuals in it fit perfectly with what I try to teach.
After teaching this curriculum for a few semesters, and after a lot of the kinks had been worked out, I decided to create my own version to give the students an example in which the poem could be interpreted. So as not to frustrate or confuse any of them, I decided to stick to the lesson plans I have created for the class.
But (and I'm blaming my Italian roots here) even though I made the rules, I broke them.
Being very interested in non-photorealistic rendering for 3D computer animation, this was an ideal time to try a plug-in that captured my interest, MNPR, to achieve a water color look.
So, as we say before eating, "Buon appetito!
Step 1: Bread
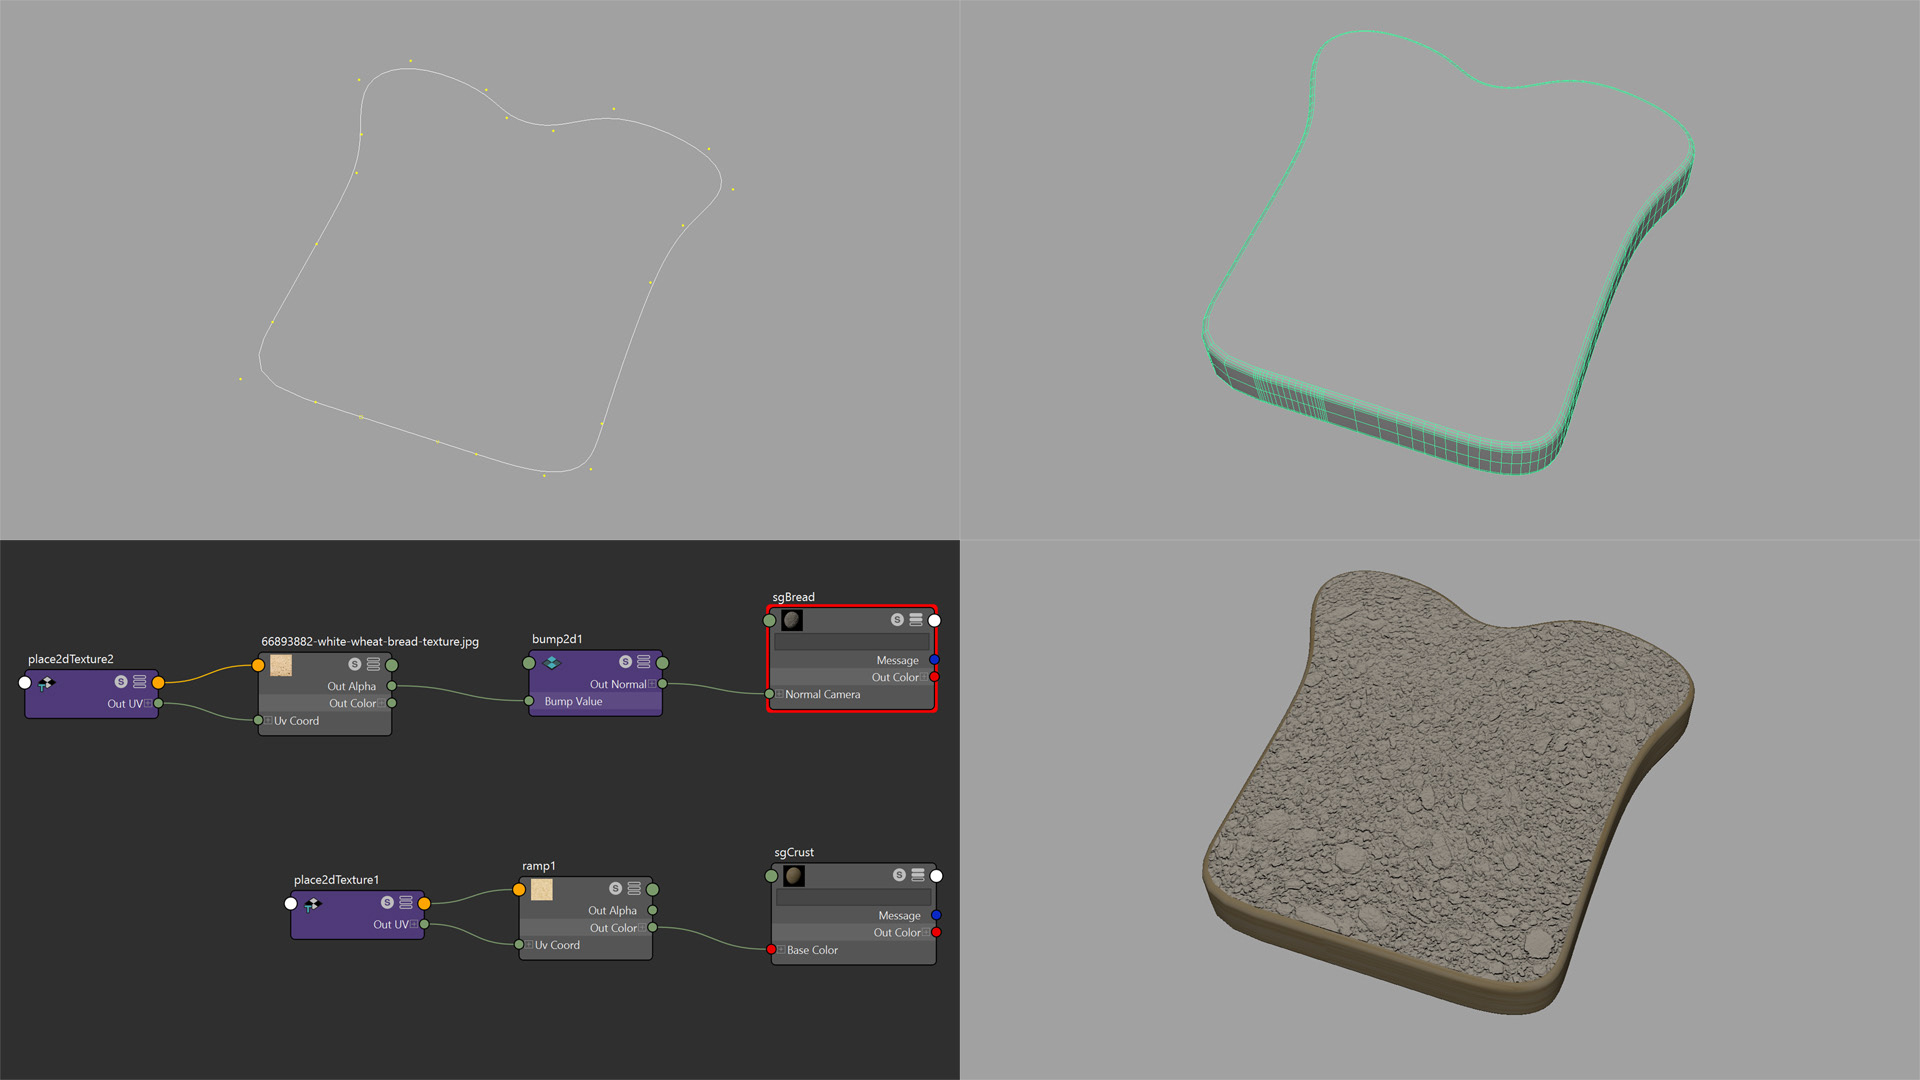
Starting with the easiest model first, I created the bread. First, a curve in the shape of a slice of bread was created and then extruded out using the Bevel Plus tool. Two shaders were created and assigned to the appropriate faces.
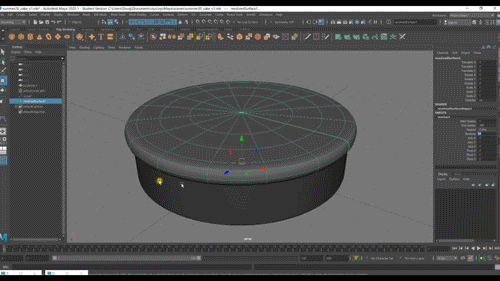
Step 2: Cake
One layer or three? That was the question.
While the cake is made of a cylinder with a bevel, the frosting was a more complicated. The problem was how to create a slightly imperfect shape with all the messy details. The answer was a NURBS surface.
I created a profile curve, revolved it and moved some the the control vertexs down the create a sloppyish frosting. This solved the shape problem but frosting has imperfections and for that a displacement map using a procedural noise texture was added.
Cutting a slice out required using every boolean operation, union, difference and intersection, that Maya has.
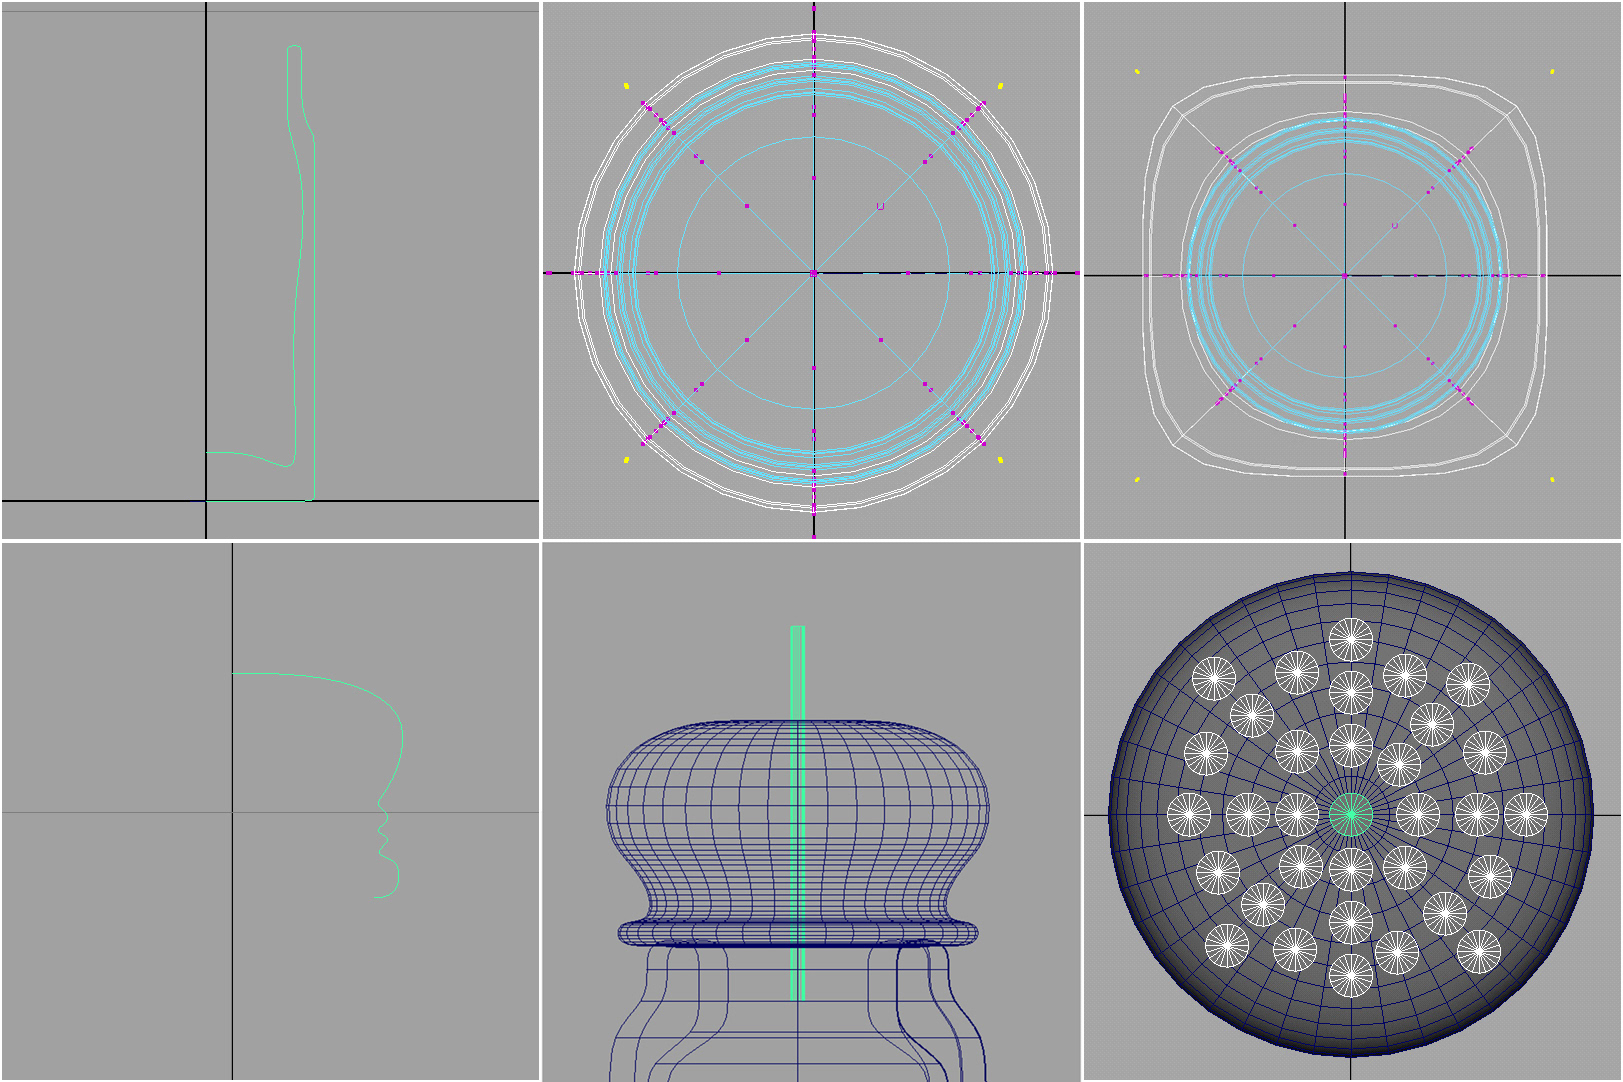
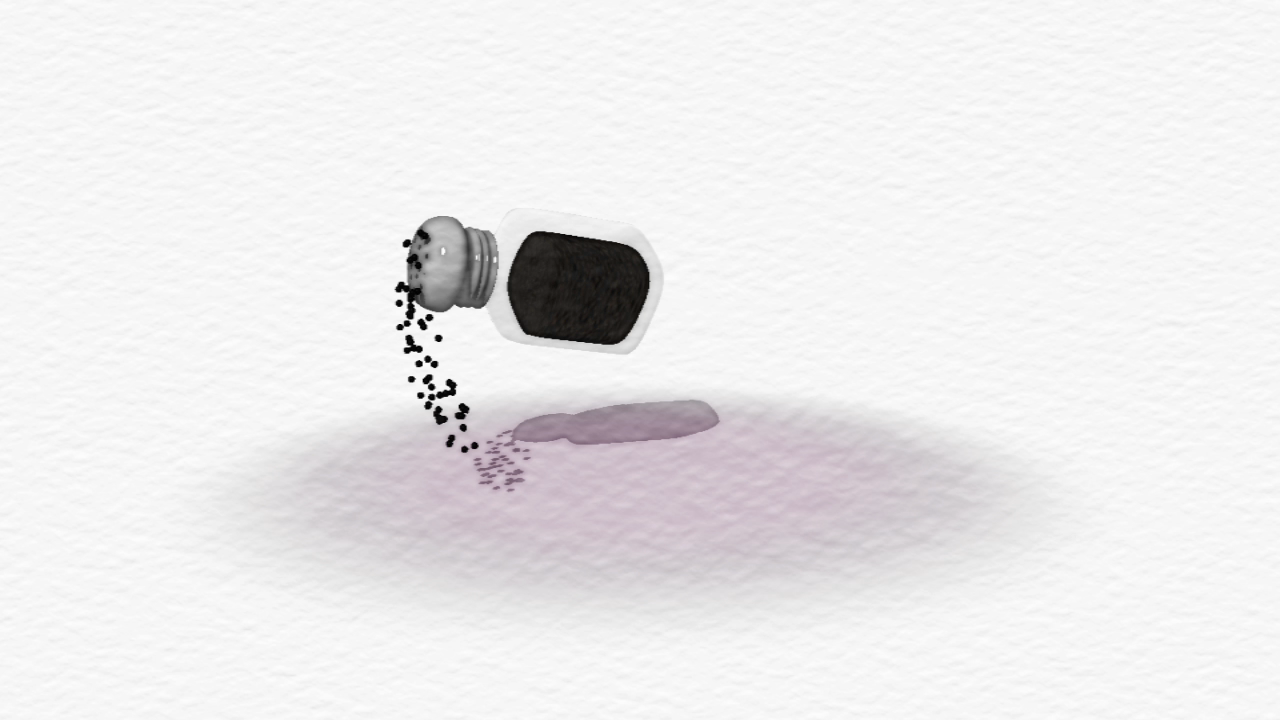
Step 3: Pepper Shaker
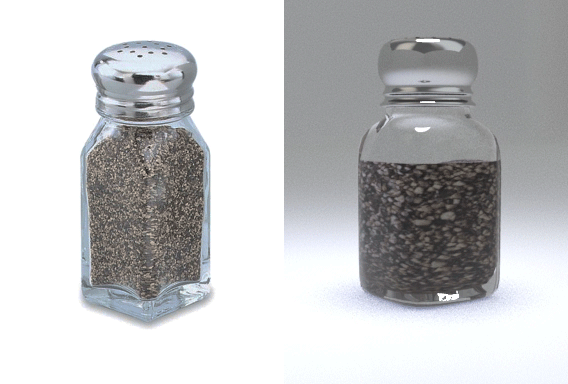
Comparison of the reference photo and the final Maya render
Glass and chrome, these are things that cg does really well. A simple revolve, pulling a few points, a simple boolean and adding the Arnold preset shaders and viola!
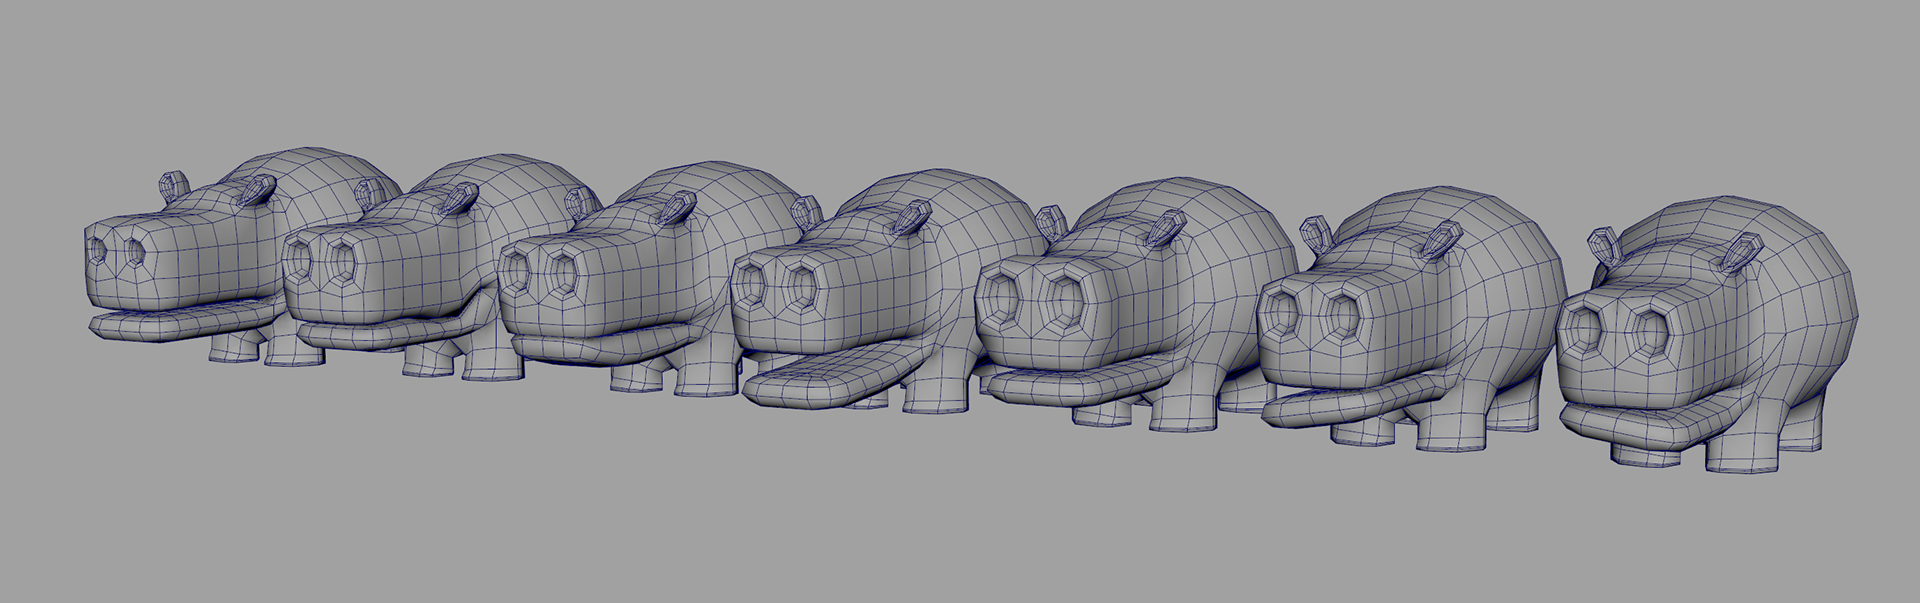
Step 4: Hippo
A deceptively simple model to make. Create a sphere and a cube, combine them and, using the extrude tool, add feet, ears, mouth, a tail and nostrils. NURBS spheres were used for the eyes and that's it.

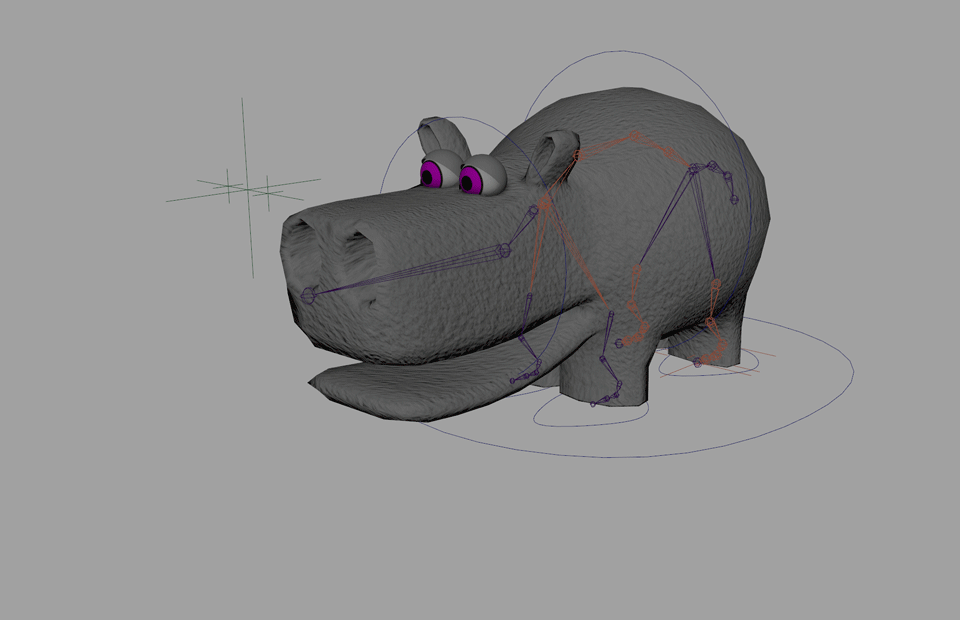
Step 5: Rigging
Prepping the big guy for movement, aka rigging, was easily the most difficult and time consuming part of the making this animation.
Starting with a basic skeleton, I added Inverse Kinematics on the legs and a roll attribute, so the feet could strike heel first when walking. The rig was finished by adding control curves that connected to the joints and IK Handles using the Set Driven Keys tool. In this way, all movements, eyes, face, body and tail could be controlled with custom sliders, making animation quicker and easier and hopefully better.
Step 6: Procedural Modeling and Animated Extrudes
An onion ring can be made with a torus but just using that by itself would be boring. So how to add a little extra, I used the texture deformer, plugged in a noise function, made a few adjustments and the geometry was displaced in just the right way.

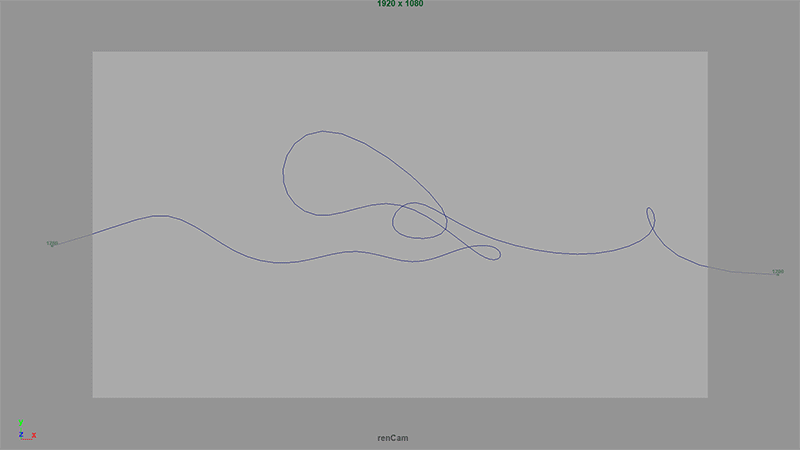
The string was created by extruding a circle on a curve. Tto be able to animate the length, the curve range>partial had to be checked. I animated the curves control vertexs to add a bit more life to the movement.
Step 7: Particle pepper
Some things are better not animated by hand and, for WHG, it was the pepper. Maya has a particle system, nParticles, that made it easy to have blobby spheres emit from a hidden plane that is parented in the pepper's hierarchy.
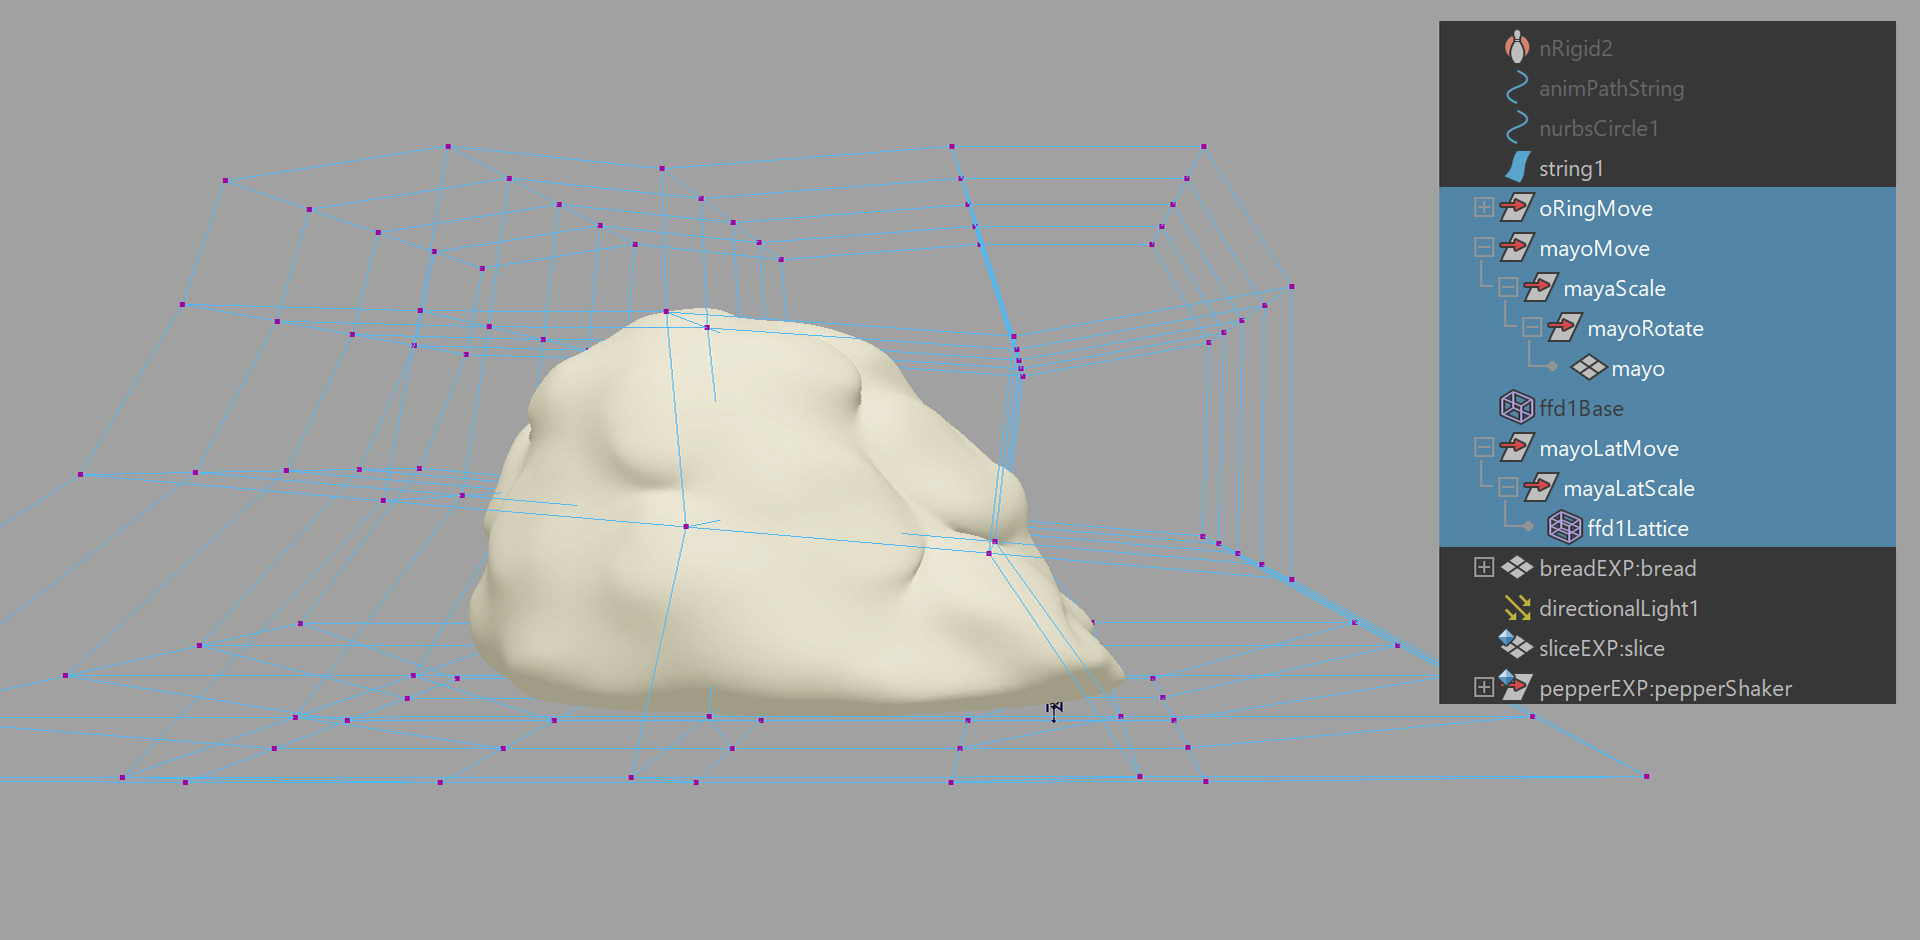
Step 8: Dynamic Mayonnaise
There are times when the most unlikely character will make you smile the most. In WHG, it was the mayo. Created by making a soccer ball, adding some extrusions and sculpting the geometry until I made a shape I was happy with. nCloth, the extraordinarily easy to use dynamic system, was used for the mayo falling in the first scene. After that it was all done with a lattice deformer. The lattice was put around the blob and, using a simple hierarchy to control the translation, rotation and scale attributes separately, animated as needed.
Step 9: Animating, Surfacing, Rendering and Editing
Now that all the assets have been created, the animation began.
My first step was to find a soundtrack. Since Shel Silverstein's poems are for kids, even though there's a hint of cruelty, I tried to keep that tone with my music. I went to my go-to site for free music first, Kevin MacLeod's Incompetech.com. He has a great search system, based on moods, and choosing happy, bouncy and funky, I found Monkeys Spinning Monkeys. I liked the vibe and it's length, coming in around 2 minutes, was just right.
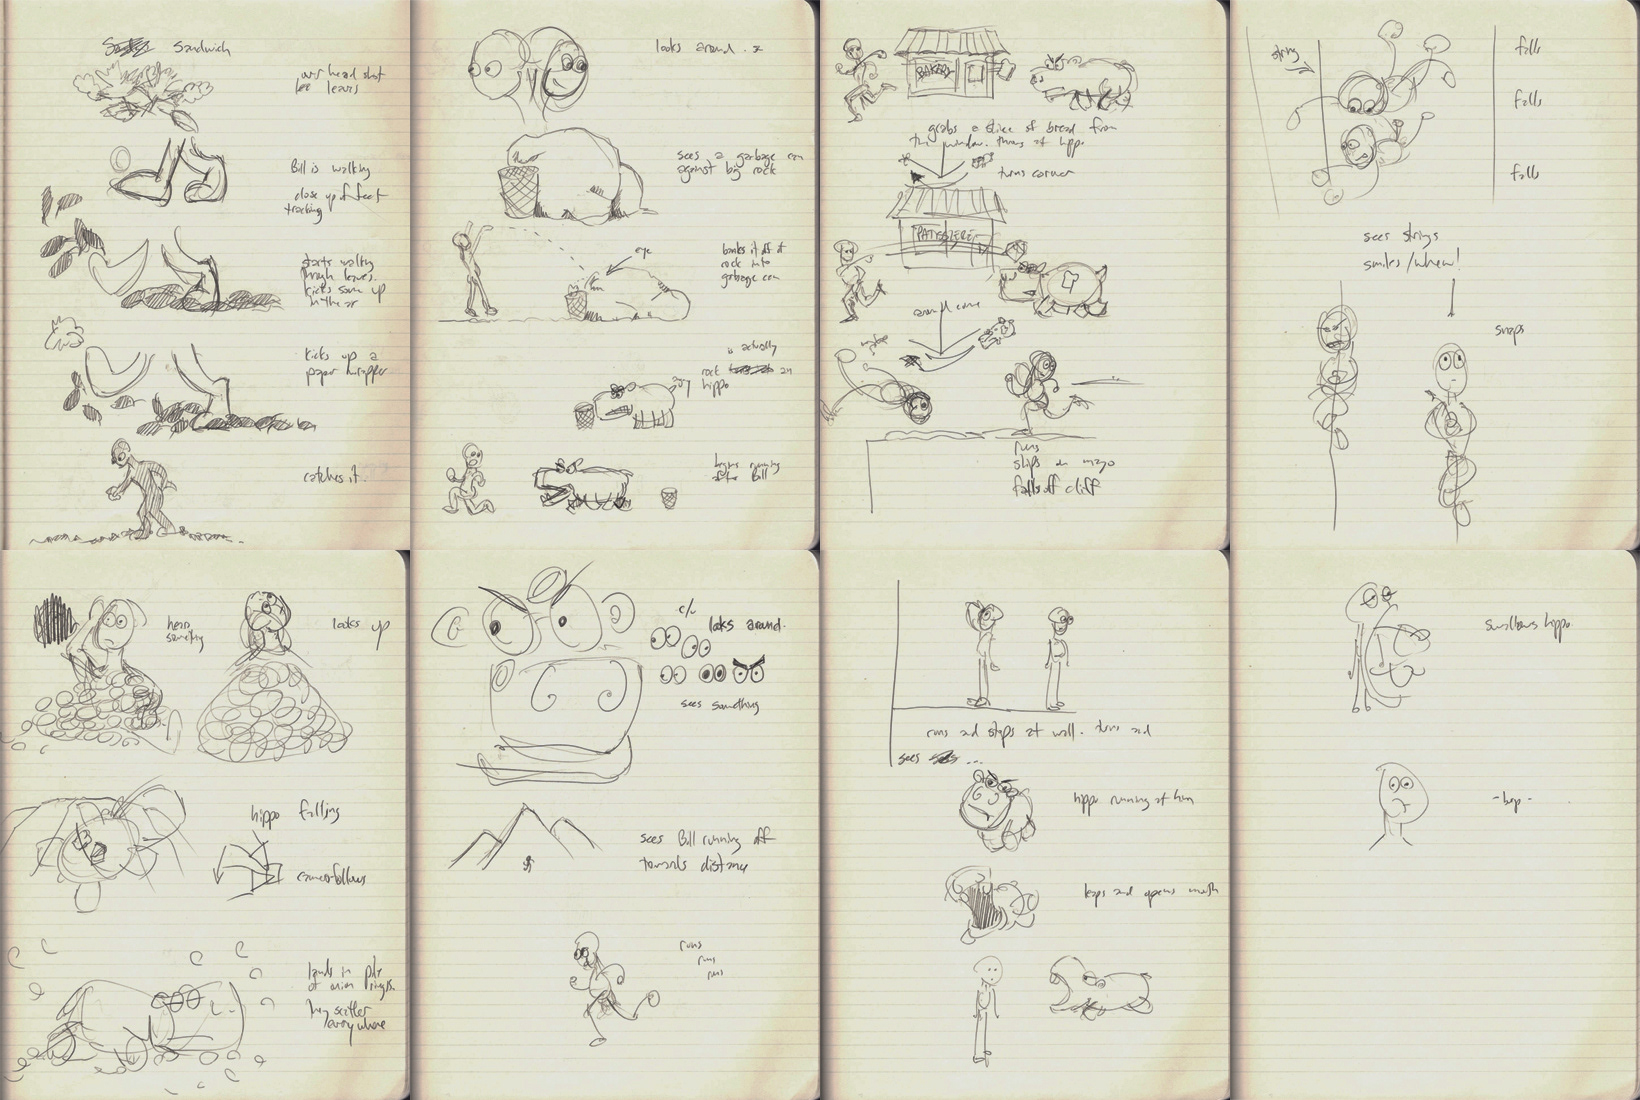
The first storyboard didn't work with the music, for this one I would have needed a composer, so I revised it. There were a few shots where hit a wall trying to figure out how to visualize the action. I solved all those problems the way I usually do, by stepping away from my screen and into the fresh air and sunshine.
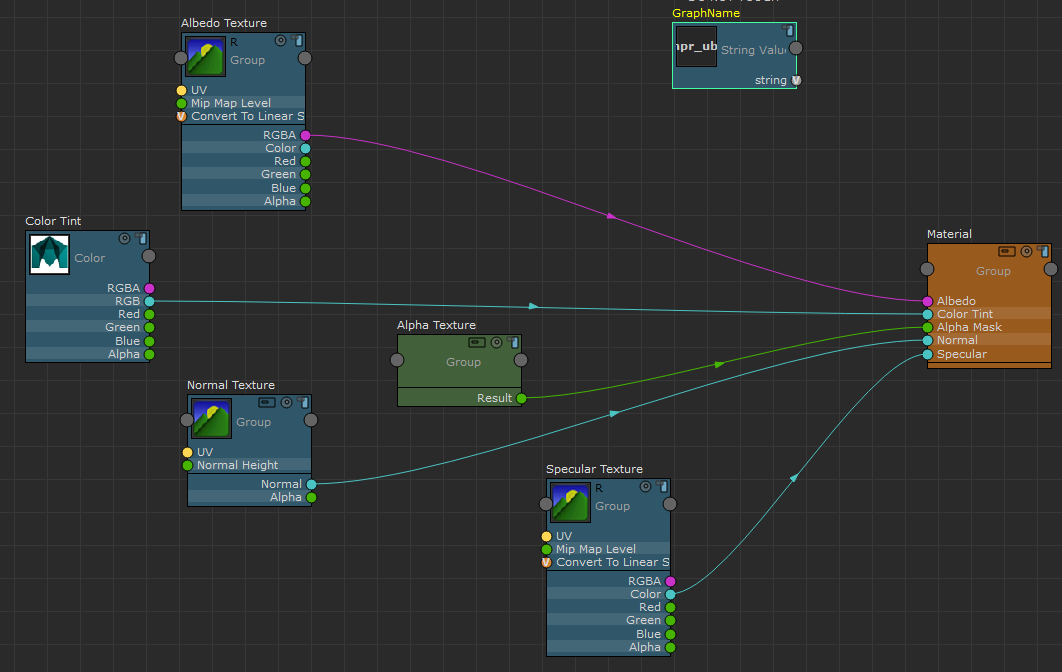
The mayonnaise's shading network
MNPR (Maya Non-Photorealistic Rendering) uses it's own materials and naming conventions, different from the ones I usually use, so that took some time to learn.
But it paid off when it came time to render. If I had done this in Arnold it would have taken hours, maybe more than a day. MNPR took minutes.
Then I brought the image sequences into After Effects for some typography. A little bit of editing and the music was added in Premiere.
So, why "Water Horse Grinder" and not "Recipe for a Hippopotamus Sandwich"?
I was hoping to enter the finished animation in festivals so I contacted the Shel Silverstein estate asking for permission. "NO!" was the answer from the lawyer. So to avoid any hassles I decided use a different title and not use any of the poem's text. I wanted the new name to be similar but unique. While researching the word hippopotamus I learned that it is Greek for water horse. And grinder, if you're a Nutmegger like me, is another word for sandwich. "Water Horse Grinder," similar yet unique.